SSH (Secure Shell) is a network protocol that gives possibility to make secure connections between two points. When enable SSH on pfsense firewall, you can safely access many remote resources depending on the type of authorization you define for each user, such as: root console, log filter, monitoring settings, SSH tunnel, etc.
How to enable SSH on pfsense via webGUI
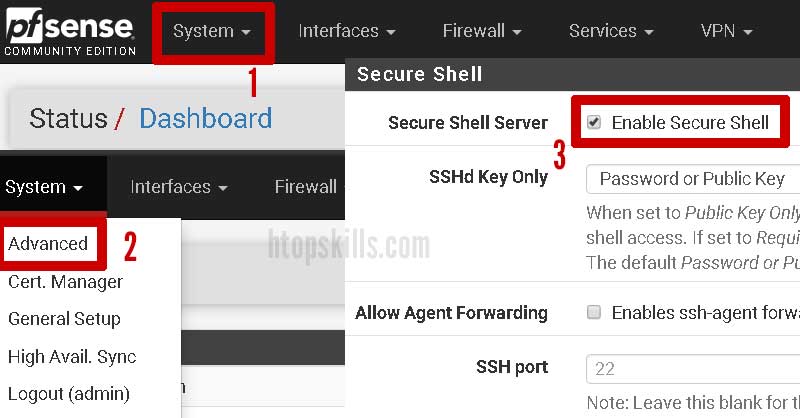
- Go to System, select Advanced, then select the admin access tab.
- Scroll down to find the secure shell section.
- In secure shell server, check enable secure shell.
- If you leave the SSH port empty, pfsense will use 22 which is the default port that SSH servers listen to. For security reasons, it is recommended to change the default port of the SSH server, as it is a well-known port that receives a lot of scans on the internet.
- In the SSH port, enter any unused port greater than 1024.
- Click save.
The SSH server is now enabled on your pfsense firewall. In other words, you can remotely access your pfsense console with username and password.
Note: It is not a good practice to access an SSH server with a username and password because hackers can guess the credentials with brute force and it is more risky if you do not have no fail2ban system.
How to enable SSH on pfsense firewall
What To Read Next
- Setup pfSense to use SSH key
- How to configure DHCP server in pfsense
- Error 1020 access denied
- Create port aliases in pfsense
- How to download the entire file in a website folder
If you like the content of this post or if it has been useful to you, please consider sharing it on your social media and follow me on Facebook and Twitter for more exclusive content.