By default, Windows 10’s search bar saved the last four queries entered in the search box. The next time you open the Windows 10 search bar, your search history will be displayed, but if you don’t want this behavior, you can disable Windows 10 search history.
This post provides essential steps to turn off search history and delete search history in Windows 10.
Disable Windows 10 search history and delete history
Click on Start, then select Settings. or
Press the Windows key + i to access the Settings app.
In the Windows Settings window, click Search.
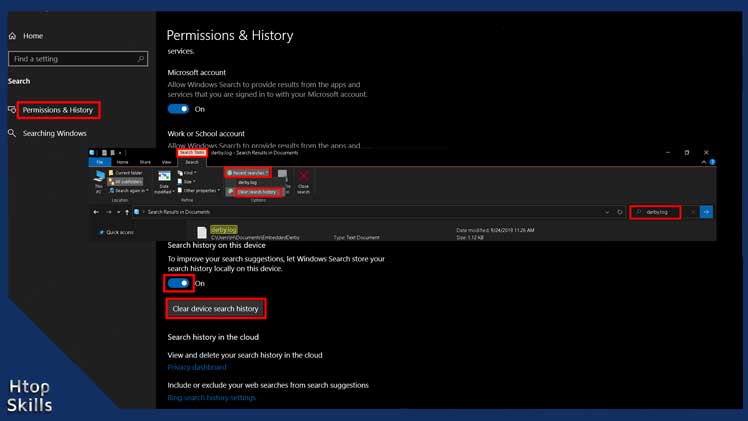
On the left side, select Permissions & History.
Scroll down to find the search history section, then turn off “To improve your search suggestions, let Windows Search store your search history locally on this device” switch.
If you just want to delete the history, click on Clear device search history. Once the process is completed, all your queries that are saved will be deleted from your Windows 10 search history.
How to delete search history using File Explorer
Right-click on Start, then choose File Explorer.
In the search area, search for something to bring up the search options in the menu. For example, type derby.log, then press Enter.
With the search tools tab selected, select Recent searches, then click Clear search history.
When the process is complete, your recent search will be empty.
What To Read Next
- How to change taskbar color on Windows 10
- How to find the MAC address of a device
- Turn On Or Off Transparency Effects In Windows 10
- How to Play DVDs on Windows 10
- How To Check System Specifications On Windows 10
If you like the content of this post or if it has been useful to you, please consider sharing it on your social media and follow me on Facebook and Twitter for more exclusive content.