It is a good idea to configure static IP address in android device if you want to access it remotely, let someone access a service on it, or if you are opening a port on your router for your android device.
If you do not have a static IP address, you cannot guarantee that you will be able to access your device over a network. When using a Dynamic Host Configuration Protocol (DHCP) address, your system may have a different IP address after restart.
This blog post provides the information you need to configure a static IP address in an Android device.
How to Configure a Static IP Address on Android
On your Android device, go to Settings and then Tap Network and Internet depending on your Android operating system version (in some versions of Android you can see Wireless & Network).
Tap WiFI
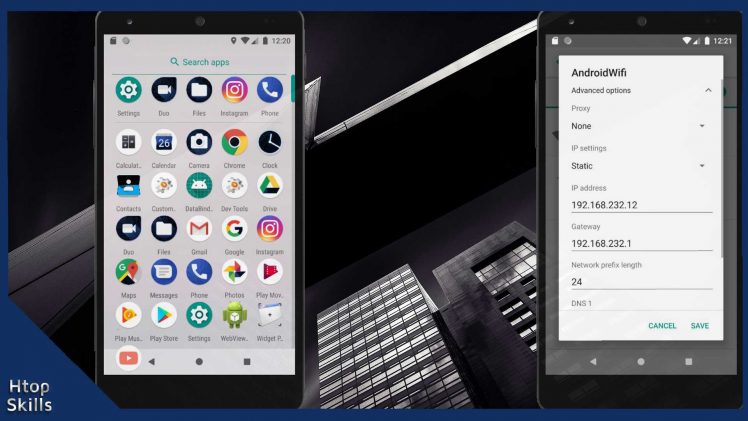
Enter the network you want to configure the static IP address. If you are already connected to the network, tap the name of the network and hold your finger until you see a new menu.
Select modify network in the new menu.
Open the drop-down menu next to advanced options.
Now in the IP settings select Static and then enter the network information you want to use. For example, the IP address, mask address, gateway and DNS that you want to use.
When you’re done, tap save.
How to setup DHCP on Android
To configure your Android device with the Dynamic Host Configuration Protocol (DHCP) address, perform the same process above, when you reach the IP settings, select DHCP.
Video to show you how to configure static IP address in Android device
What To Read Next
- How to remove a Gmail account from Android
- How To Set Up Outlook On Android
- Send emails as attachments in Gmail
- How To Change Country In Google Play Store
- How To Make Chrome Default Browser On Android
If you like the content of this post or if it has been useful to you, please consider sharing it on your social media and follow me on Facebook and Twitter for more exclusive content.